BLOG
Edinburgh Festival & World Press Photo 15

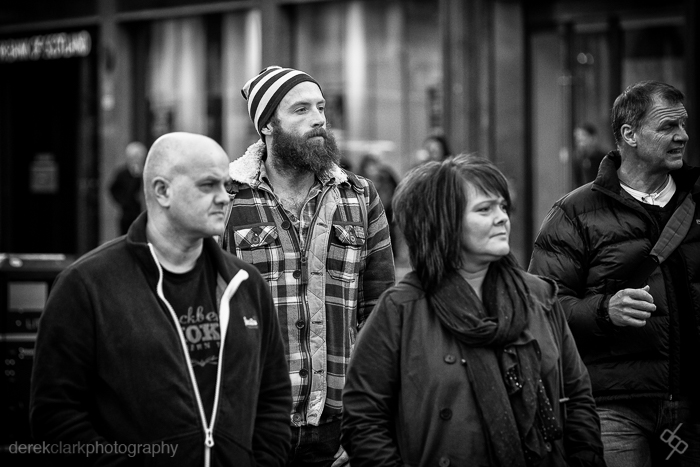
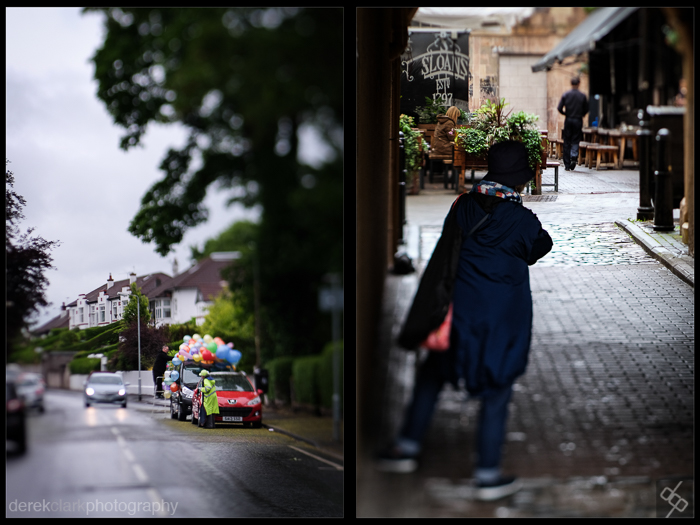
It was a busy rainy day at the Edinburgh festival. Sure it was busy on the streets, but I'm talking more about cramming in as much in the day as possible. I traveled there on the train with my two photographer friends, John McPake and John Summers. The idea was that we would go to Edinburgh for the day, shoot some pictures and visit the World Press Photo Exhibition at the Scottish Parliament building. But by the time the day came around, I had been booked to shoot a musical comedy act at the Playhouse (thanks to my Kage Collective accomplice Robert Catto) and had a meeting at a venue about an exhibition that I will be involved in this coming November.
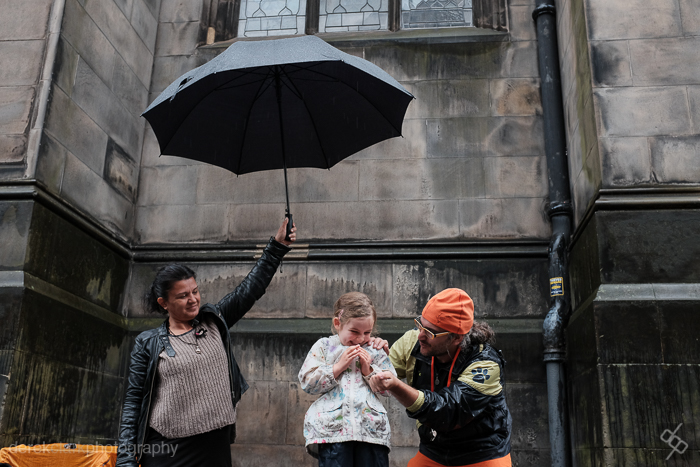

I really don't mind rain when shooting on the streets. Everyone is so distracted by the weather and seem to have tunnel vision, that it's so easy to get in close. If you're holding an umbrella with your left hand, nobody notices the camera in your right hand. I'm really enjoying using Fuji's Classic Chrome film simulation and find that the out of camera JPEG's need little to no work in post. A bit of Contrast and Clarity in Lightroom and maybe a vignette and they're done. But they're definitely very usable straight out of camera. I shot a lot of Kodachrome on my OM-2n back in the 80's and to be able to get that look straight out of camera using Classic Chrome is really great.


Edinburgh is a fantastic place to be when the festival is in full swing. It doesn't matter if you're a tourist or a local, the Fringe is constantly bubbling over and constantly changing. It's a street photographer's dream and I always look forward to multiple visits each year. It's also a good place to try street photography for the first time if you've always wanted to try it, but were a bit uncomfortable about pointing your camera at a stranger.


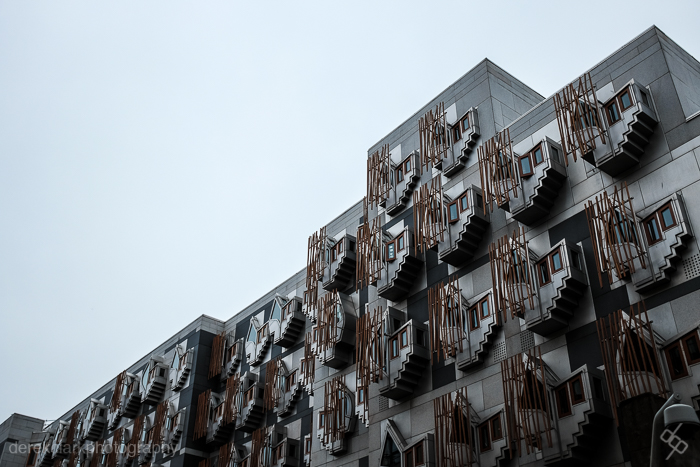
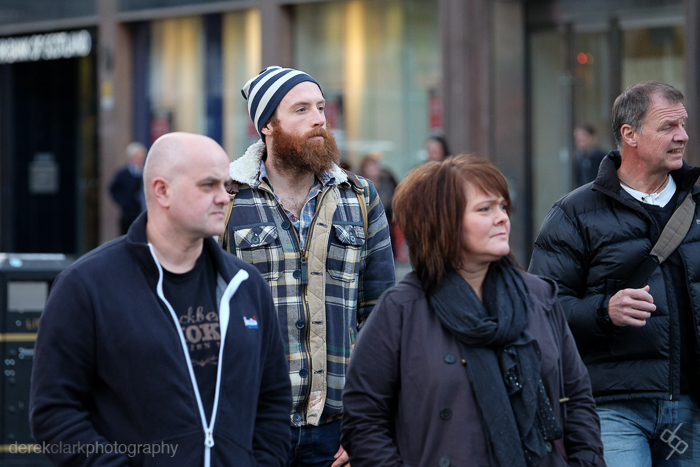
World Press Photo 15 in the Scottish Parliament Building (above and 3rd from the left) was well worth a visit and had a good variety of pictures. WPP has had a lot of controversy over the past year or two, but there is some fantastic work this year and it's a shame the event has been tarnished a bit. I bought the book on Amazon the next day and have to say that although some of the pictures work better on a wall, a lot of them look even better in the book, as the prints in the exhibition seemed to be a little up and down on the quality department.
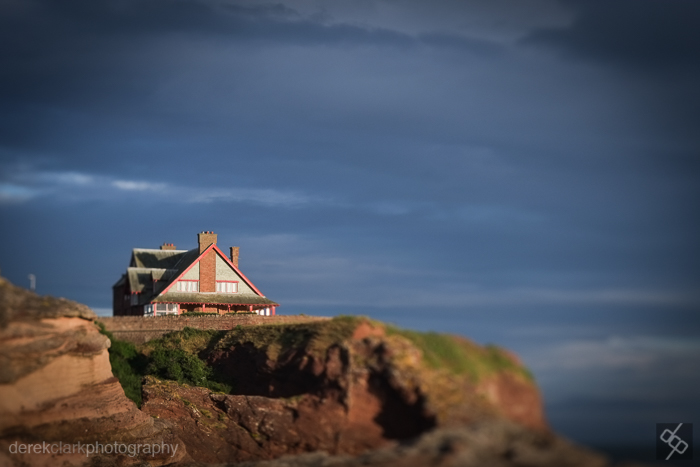
I've been back to the Edinburgh Festival since to test the latest 90mm f2 lens that Fujifilm UK kindly sent me for a test drive. I'll have a full review here soon, but lets just say that the shallow depth of field blur is probably the best and smoothest I've seen on any lens, from any manufacturer.
The Catacombs Of Paris

We walked down a spiral stone staircase and felt the temperature drop with every step. The Paris sun above had been blistering hot and we welcomed the break away from the heat for a while. We walked slowly through the dimly lit tunnels for a while, a little less impressed than I had expected. Then just as I started to wonder what the big deal was about, we walked into the next section and there it was, stretching out through the passageway.
A German kid reached out with a single finger and poked around inside the eye socket of a human skull. A man with a thick french accent called out in english "Do not touch the bones, this is a cemetery!". The kid pulled his finger back out and moved on until out of site of the skullkeeper, then continued to fondle and prod as many skulls as he could until being told off again, this time from a voice in the darkness that made him jump.


The skeletal remains are expected on this trip underground, but it's the sheer volume of them that is shocking. The bones from all the cemeteries in France were brought here between 1786 and 1788, always at night under a black vail and lead by priests. Walls of bones and skulls are stacked neatly into walls 5' tall (sometimes floor to ceiling) and at least as deep. There's even the odd roundabout made of bones. The tunnels stretch for miles below the streets of Paris, under blocks and blocks of houses.

Oddly, I came across a small pile of old photos placed on top of a stack of bones. These were the last things I expected to find here and they were like an electric shock, a sudden realisation that all of those bones were once regular people, families with kids.


Then suddenly another stone spiral staircase rises steeply in front of us. The climb felt never ending and after days of walking the streets of Paris, my calf muscles could have done without the haul back up to the streets. A quick security check to make sure my camera bag didn't contain the odd skull and we were outside again in bright sunlight and fresh air. I had no idea where we were, but I knew we had travelled a great distance underground. I glanced back, wondering if the German kid would emerge from the staircase holding a skull like a bowling ball, but he was nowhere to be seen.
The Digital Contact Sheet :: Episode 7


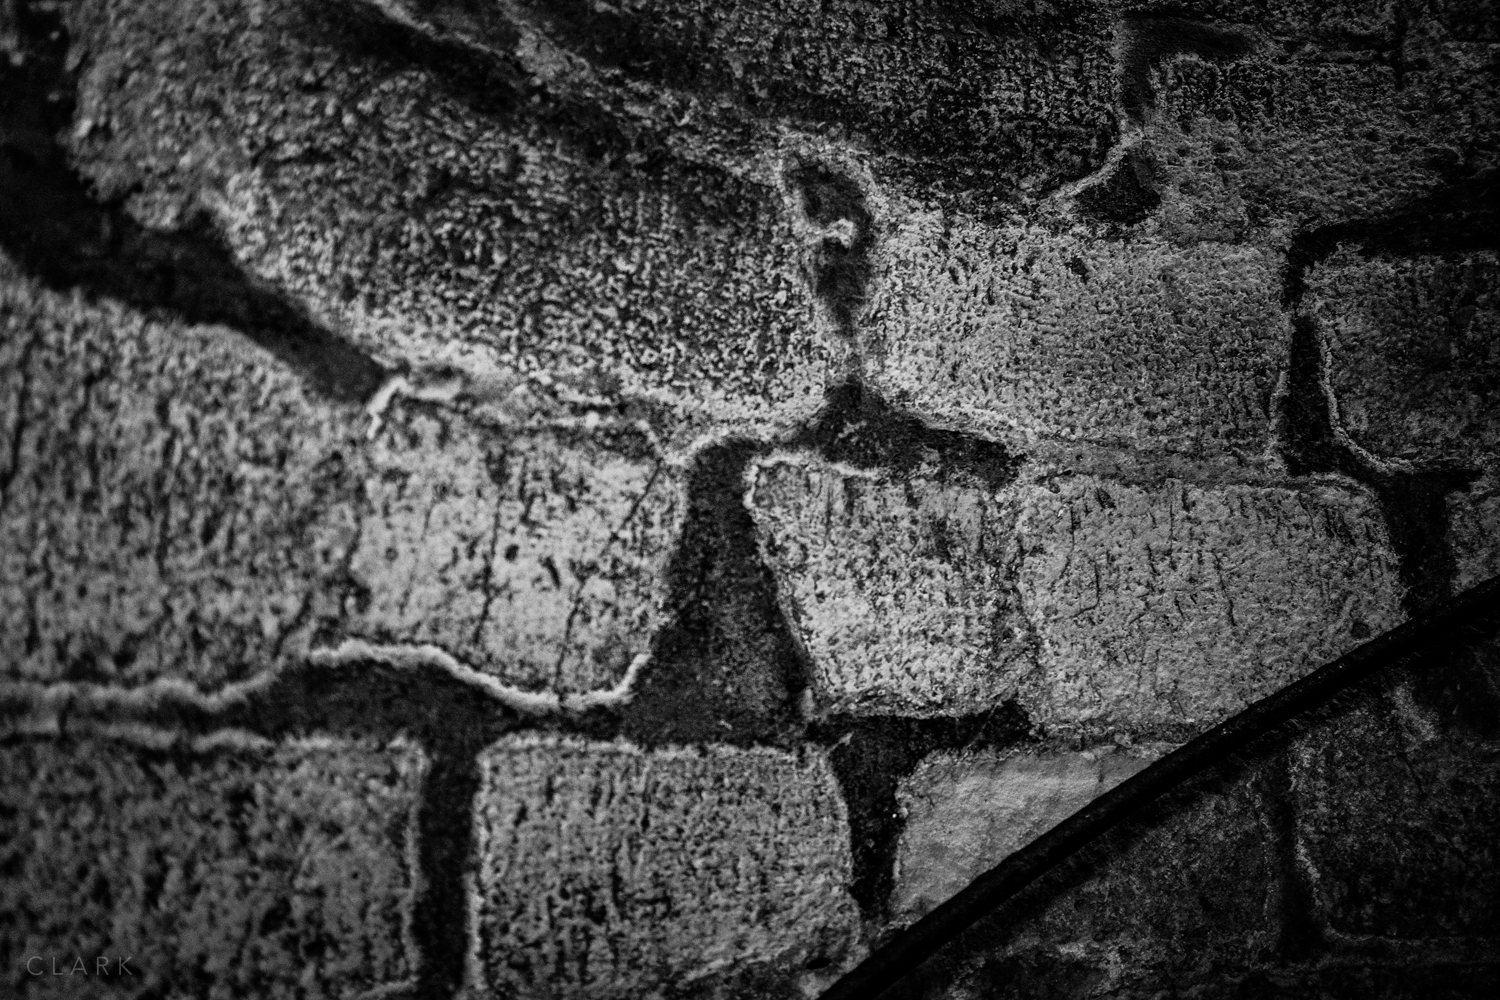
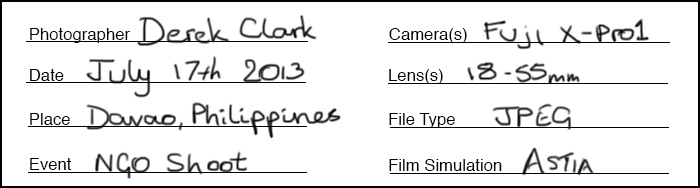
I shot a series of pictures for an NGO in the Philippines in 2013 that involved visiting orphanages in Cebu and Davao. The organisation is called SOS Children's Villages and you can find out more from their website HERE. The shot above was taken in the Davao City village the day before I flew back to Hong Kong. I was looking for a dramatic picture when I came across this scene. I had already shot some pictures of this boy earlier that that day, but after making my way around the village, I came back as the kids were doing their chores. The smell of the smoke caught my attention first and then I saw it creep out between the houses. I walked toward the smoke and saw the two boys from earlier. The smoke was thick and I wasn't sure I would be able to get a usable shot, but I fired off a few frames and hoped for the odd clear spot.

The first three frames on this contact sheet are from the end of another sequence which was a good crop of pictures of a girl studying on a porch. I wanted to show this sequence of twenty-five because it demonstrates how the photographer has the ability, or the power if you like, to show a scene in a way that leads the viewers emotions and thereby the way he or she interprets a scene. My friend Patrick La Roque wrote a post on our Kage Collective website about this very thing and I would urge you to read it HERE.

I like this shot of the two boys away from the smoke. Although I didn't pose this one, the boys saw the camera and looked into the lens. But I like the composition with the boys off to the right and the wall producing strong leading lines. The Fuji sensor always produces great colours too. I actually have this one printed and hanging on my office wall in a plain black frame with white mount.

The picture above shows the exact opposite of the featured shot. We see a boy full of fun who doesn't seem to have a care in the world, a far cry from the one below, that sees him working in the yard cleaning up and burning leaves with a home made shovel.
This is the one I used from this sequence. This for me, is a great story telling image that makes the viewer read into it and hopefully ask questions. It's a natural moment that brings out empathy for the subject. The fact that he is using a homemade broom only enhances this feeling and draws us deeper into the story behind this young orphan boy.
Makoto Ozone & The SNJO :: Jeunehomme CD
 I've been shooting Project Jazz now for over two years. The project started as a one-off shoot with The Scottish National Jazz Orchestra to feature as a story on The Kage Collective website, but it quickly grew legs as a long term project with no end. My love of jazz and mutual interest with orchestra leader Tommy Smith in documenting the scene has just naturally evolved into something bigger and more important than originally planned.
One of the offshoots from doing all this work with the jazz orchestra is to have my pictures used in promotional pieces and album covers. I covered the recording session with the SNJO and saxophonist Bobby Wellins for the Culloden Moor Suit CD and those pictures were used on the inside cover. More recently the live recording of guest pianist Makoto Ozone was released as a CD with the strange title of Jeunehomme. My photographs from that concert were used exclusively for the CD. I used two copies of the CD for the photo below. The CD is on sale HERE

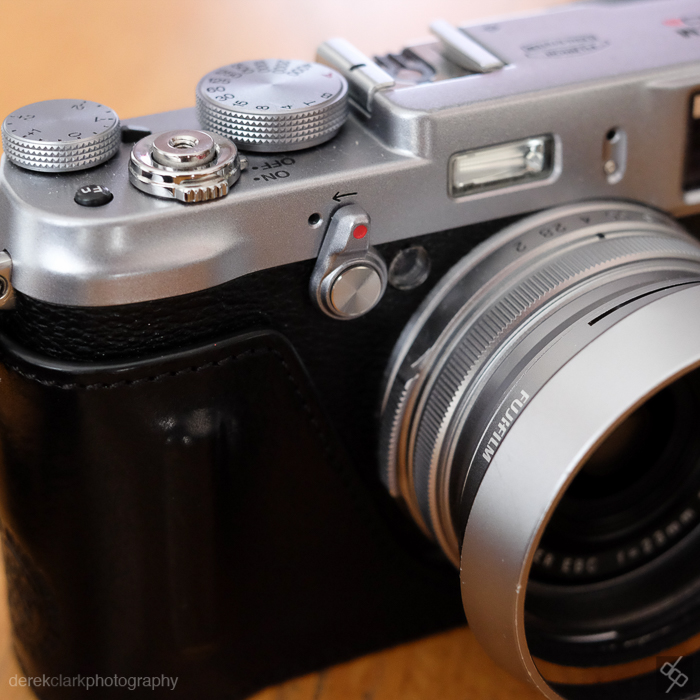
The cover shot was taken with the 56mm lens at f1.2. I focused on Makoto's hands because he is a pianist and those fingers are where the magic comes from. I had already shot saxophonist Courtney Pine from the same position the month previous, so I knew I could get enough shallow depth of field creaminess at f1.2 to make his hands stand out.

There's a lot of work involved in shooting these gigs and spending days in Lightroom editing, but it really is a labour of love and something I see as important. I've stood alone backstage with many amazing musicians just before they walked on stage, and I've been a fly on the wall to some great musical moments and it's all down to a camera.

This is the only wide angle shot from Jeunehomme. It was taken with the XF 14mm f2.8, a lens that I no longer own as I upgraded to the newer 16mm f1.4. I'll miss the 14mm, but I need the faster lens more than I need that extra couple of mm. Plus, the 16mm comes in at 24mm in full frame terms and that's a focal length I've always liked. My last shoot with the 14mm (the day the 16mm arrived) was actually at the recording session with The BBC Scottish Symphony Orchestra for Tommy Smiths latest project. More on that very soon.
Lensbaby For Fujifilm X-Mount

DerekClarkPhotography.com-TripBaby01
At last, the Lensbaby system is finally available for Fuji X-Mount cameras. I've been holding off for a long time for this to happen, rather than buying a Nikon fit and Nikon adaptor. The only problem was that the combination of Composer Pro and Edge 80 optic that I wanted, didn't seam to be available. For some reason, the Sweet 35, Sweet 50, Circular Fisheye and Velvet 56 are available for X-Mount, but not the Edge 80. So I contacted Lensbaby direct and they offered to sent what I wanted as a special order. The price was what I would have expected to pay, but if you live in the UK and want to go down this route...BEWARE! UK Customs wear black masks and funny hats. They charged £92 import duty, which to me is not only excessive, it's blatant theft. But hey, welcome to (not so) Great Britain! Anyway, I digress.
DerekClarkPhotography.com-XT1A3415
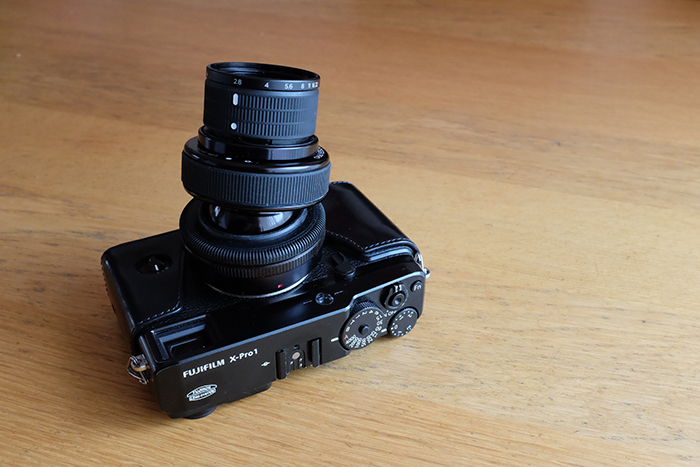
If you haven't used, or even heard of Lensbaby, it's basically a creative lens system. Although they have a couple of stand alone (direct mount) lenses available, the most popular lens baby's consist of a lens barrel and various optics that can be swapped out. I opted for the Edge 80 as this has more of a tilt shift effect and due to it's 12 aperture blades, it also has the creamiest out of focus areas. One slight drawback, which can also be a plus too, is that on a Fuji's 1.5 crop sensor, the Edge 80 becomes a 120mm focal length (in full frame terms). I'm not used to this length on my Fuji's, so it's taking a bit of getting used to how far back from my subject I need to be.
Fuji_X-Pro1_Lensbaby_Edge80
As you can see from the image above, the Lenbaby Composer Pro is basically a ball and socket sort of thing with a locking ring next to the mount. This can be locked into place, left totally loose or anywhere in between. Next ring up is for focusing, which needs very very fine movements or you will get nothing but blur. The third ring up is for aperture (f2.8 to f22) and the final ring, although it doesn't turn and actually has the f stops marked on it, can be pulled out to take the Edge 80 into close focus mode (which is not that close at all). I've heard the words 'super sharp when used in the centre position'. Now maybe I'm spoiled by the amazing sharpness of the Fuji lenses, but I wouldn't say that the Edge 80 is the sharpest tool in the bag. But that's ok, because I don't think sharpness is what this thing is all about. It's about being creative and as Lensbaby says 'see in a new way'. And that's pretty much what it does, it allows you to look at ordinary everyday things and see them transformed into something unusual and fresh. It changes things up and forces you to look at things you might not otherwise look at, just to see what Lensbaby does to it.
DerekClarkPhotography.com-TripBaby02
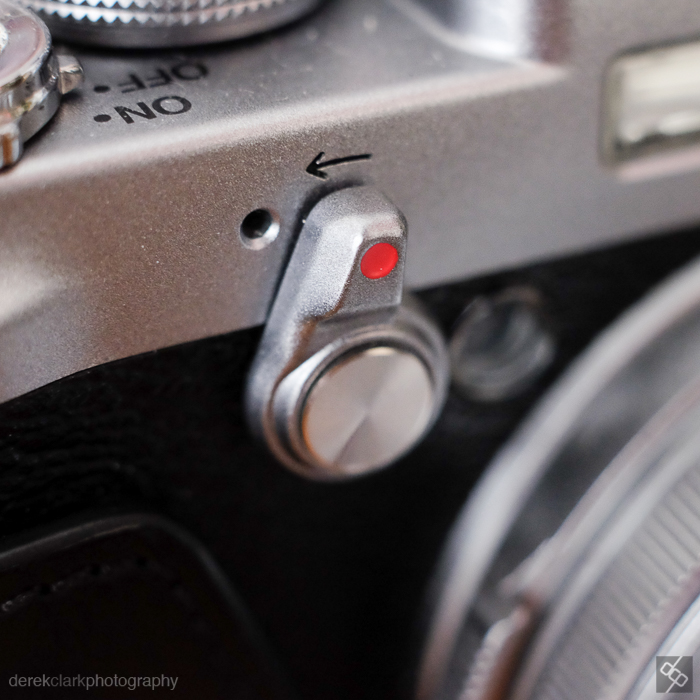
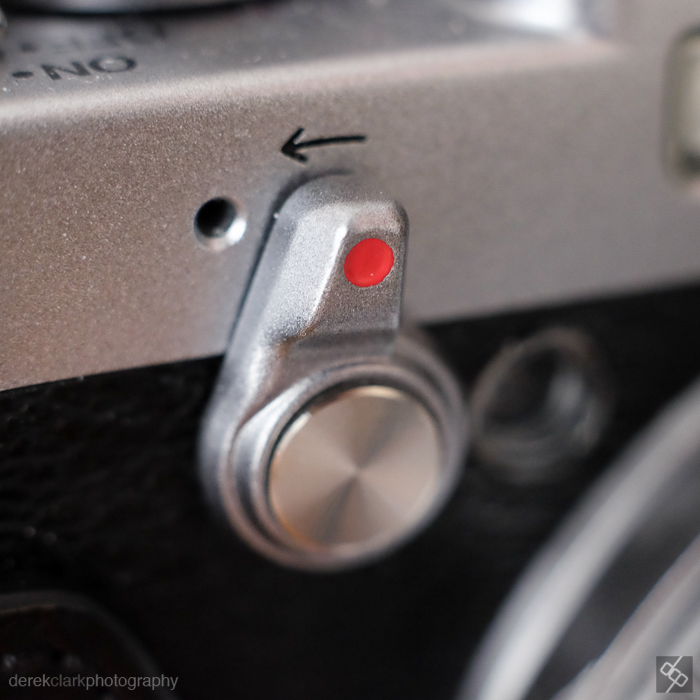
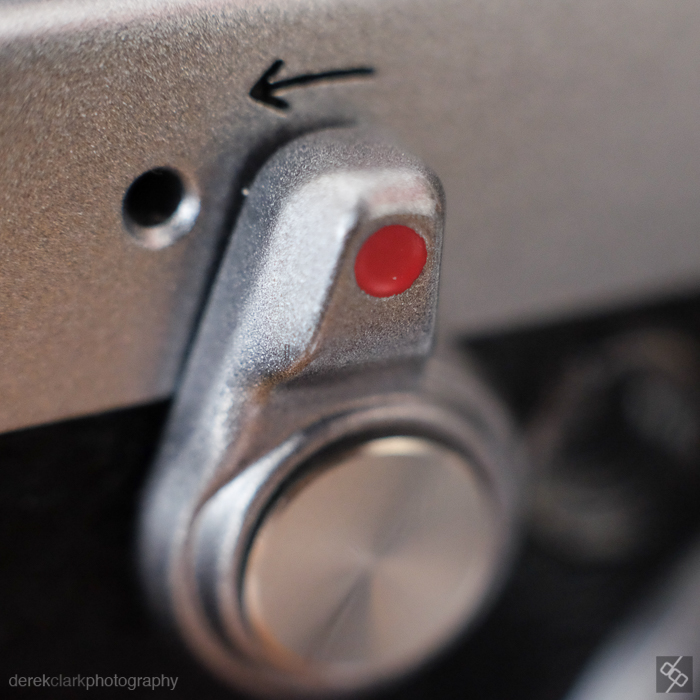
A couple of things as far as setup goes on an X-Series camera. Look in the menu for 'Shoot Without Lens' and turn it on. The Lensbaby is completely manual and does not communicate with the camera in any way, so the camera will think there isn't a lens attached. The Lensbaby is a manual focus lens, so it won't matter if your camera is set to Auto Focus or Manual Focus, it will still only focus via the focus ring. But I would highly recommend setting the camera to Manual Focus as you will then be able to use Focus Check by pressing the wheel on The X-Pro1, E-E1/2 etc...or the Focus Check button on the X-T1. The X-T1 won't do this automatically like it does with other lenses, because once again, there are no electronics on the Composer Pro. You might find Focus Peeking will be a benefit too.
DerekClarkPhotography.com-XE1X7645
I didn't want to make this post too word heavy (too late for that), but just show some pictures from my first walk around with the edge 80. I'm looking forward to trying this out at my next shoot for Project Jazz. I'll also post some street photography shots using the Lensbaby over at 35mmStreet, but in the mean time I'll leave you with this one.

DerekClarkPhotography.com-XT1A3457-Edit
Just Another Fine Art Monday...

Just another Fine Art Monday I shot it on Sunday 'Cause that's my fun day Just another Fine Art Monday
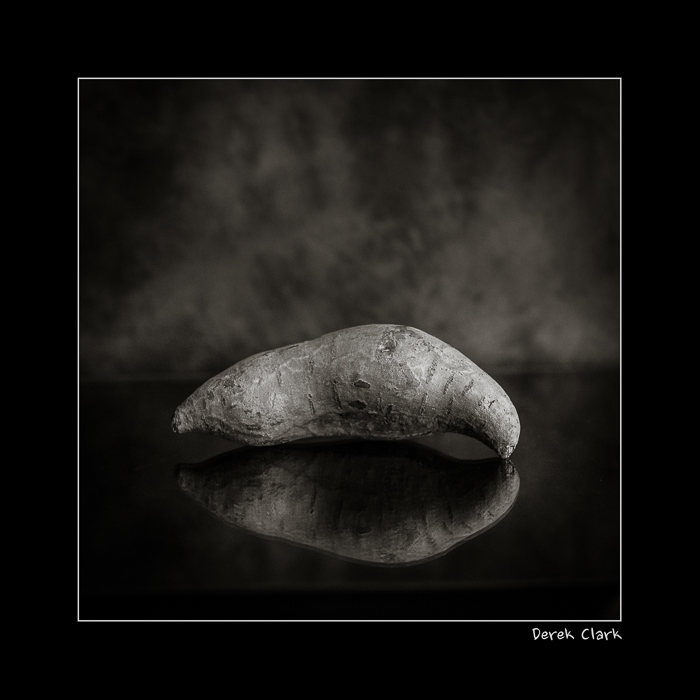
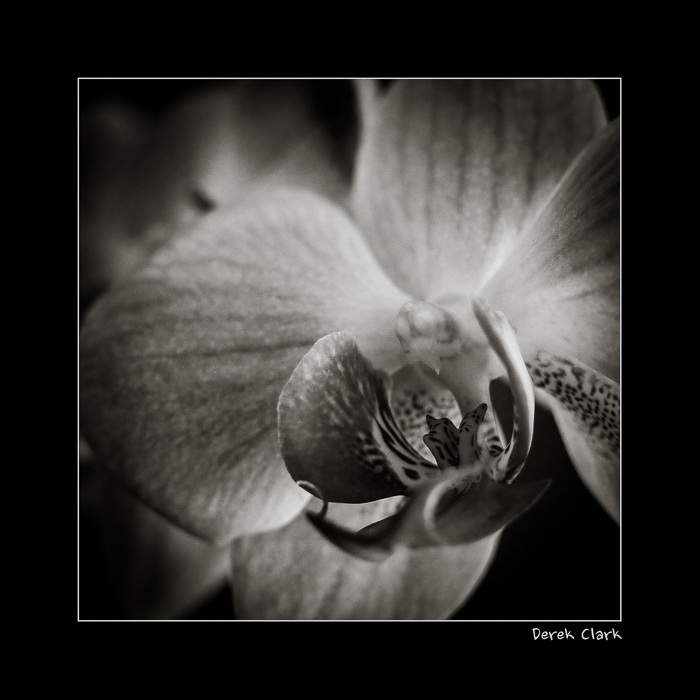
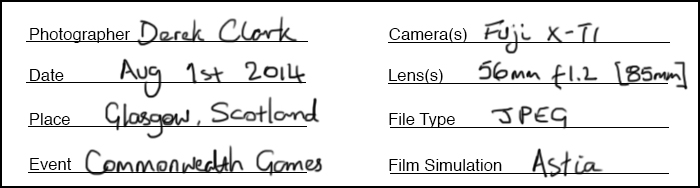
Take a pineapple, a sweet potato, a branch, a rose and a flower (no idea what it's called). Add one Fuji X-T1, a 56mm f1.2 and two sprinkles of MCEX-11 Macro Tube (pic 2 & 5). That's it. Window light with a Lastolite background.

Fujifilm Macro Tubes MCEX-11 & MCEX-16
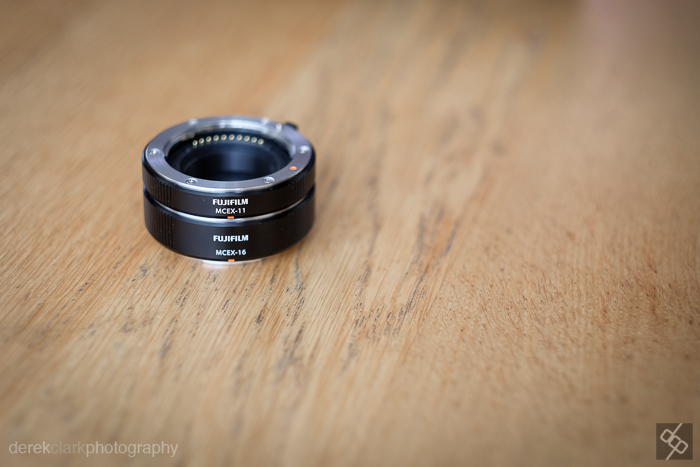 I just got hold of Fuji's MCEX-11 (11mm) and MCEX-16 (16mm) Macro Extension Tubes and I wanted to do a quick comparison. Fuji has a table on line with all the information in numbers form about focus distance etc, but photographers are visual beasts. So as I couldn't find much in picture form on line, I thought I would show some examples of what you get from each of them. I have included one with just the lens, one with the 11mm, one with the 16mm and one with both tubes stacked together. All shots were taken with the camera as close to the subject as possible. I basically focused each lens to minimum distance and then moved the camera in until it achieved focus. I have kept the subject the same throughout (my X100S) so that you can get a good idea of what the difference is from lens to lens with each tube. All of these JPGS were shot square in camera (yes, your X camera shoots in square and 16:9 too:o). Please note, the wider lenses (14mm, 18mm & 23mm) worked with the MCEX-11, but the lens touched the X100 before focusing was achieved with the 16mm or both stacked. The 35mm lens went in so close with both tubes attached, that I had to remove the X100S lens hood.
These tubes are more than double the price of the equivalent on Amazon or Ebay, but as this is a one off purchase and because I've read a lot of comments on line about the electrical contacts not working on third party ones, I though it was worth going for the original Fuji tubes. Besides, I sold my 60mm Macro lens when I heard these were coming out as they're smaller and easily stuff in the corner of a camera bag. Built quality is extremely high and the fit is tight (but not too tight). My one gripe is that neither of the tubes come with a case or a bag and as these go between lens and camera, dust is not welcome. I'm storing them in the little cloth bag that came with the X100 lens hood at the moment. I've used the 56mm f1.2, the 35mm f1.4 and the 50-140mm f2.8 for examples here. I think owners of the 56mm will get the most use out of these, as that lens has a poor minimum focus distance. Sop here are the results.
I wanted to confirm that the photos from the 50-140mm f2.8 lens are correct. I had to check the metadata to make sure these were in the right order. I even re-shot them just to be 100% sure. I hope this post has been useful. Use the comments section if you have any questions about these tubes, or if you would like to see a ring shoot ...etc.
The Digital Contact Sheet :: Episode 6

I recently uploaded a video to YouTube featuring a selection of my street photography during the 2014 Commonwealth Games in Glasgow (Scotland). It's kind of a video contact sheet in a way, as there are a few shots in there that are obviously short sequences. There is one picture in the video that seems to stand out for some people and as I remembered it was a lengthy sequence, I thought it would make a great Digital Contact Sheet. Feel free to check out the video mentioned above by clicking HERE. Click on the images below for a 1500px wide version.

I came across this guy feeding pigeons at George Square during the 2014 Commonwealth Games. I shot a few frames leading up to what you see above using the 10-24mm lens that Fuji had sent me to try out, but it was a bit wide so I switched to the 56mm f1.2. As you will see from the contact sheet, I started off at the subjects right hand side, but the background was messy and I moved from a low POV to standing. I still wasn't getting what I was looking for and I knew there was a good shoot here. I don't often spend as much time on a single scene when shooting street photography, but I felt it was worth sticking with and besides, neither the subject or the pigeons were bothered by me being there. I was using the Fuji X-T1. The X100S would typically be my weapon of choice, but I was testing lenses for Fuji too.

I moved around the scene in a clockwise direction, taking more shots than I normally would have, but the birds were changing constantly and I knew it would be a tiny move either way that could make the shot. I started off at f4, but as I moved to the subjects left side, I switched to f1.2 to blur the background and loose the distractions. Sometimes you can see all the elements of a photo and you just need to wait or keep shooting until those elements come together to make that single frame that works in all the right ways. Sometimes you wait and the scene falls apart and you get nothing.
 The image above is the straight out of camera JPEG. These last couple of years I've started to wear glasses, but I look over the top of them when looking through the viewfinder, tipping my head forward to try to get in as close as possible. This is not the best way to get level horizons, so as you can see from above and the final image below, I had to straighten the picture in post. But the point of showing the SOOC version is to let you see how nice the Fuji JPEG's are. The X-Series are the first digital cameras that I feel could have useable files without the need for computer work. If fact, adding Contrast and Clarity in Lightroom is all you might need for a great shot.
 This is the finished shot (above). 1/4000th of a second at f1.2 & ISO 200. After straightening the horizon as much as I could without chopping off part of the guys feet and hat, I sent it out the Nik's Silver Efex Pro 2 to get converted to B&W. This is my own preset for street photography, but it's mostly just a good mixture of Contrast and Structure. As long as my picture is exposed properly, it's a one click process in SEP2 and then save back in to Lightroom ready for export. As you saw from the contact sheet, there were many usable shots (maybe as many as 15), but on this occasion I felt that there was a possibility of something better. I was waiting on a gesture from the subject or something interesting from the birds. As I pressed the shutter and the image was displayed in the EVF, I knew I had got what I hoped for. In that single gesture of the hand, I knew I had what to me looked almost biblical. That was the last frame I shot of the scene with the X-T1 and the 56mm. Although I shot six more with the X100S and the TCL-X100, I knew it was pointless as I had the one I was looking for.
P.S. I have a new story published on the Kage Collective site today called Fashion Consciousness
The Next Level :: Fuji X-T1 Firmware v3.0
 The much anticipated v3.0 firmware (they totally skipped v2) for Fuji's X-T1 has arrived and boy is this a big deal. It has a whopping 27 new features, with more than a few of my long term requests. I won't go through all of them here as they're listed on the firmware download area on the Fuji site, but I wanted to highlight a few of the most important ones here IMO. If you don't think this update is a big deal, just think of how little difference there is between a Nikon D800 and D810. Now work out how much it would cost to upgrade from the former to the later. Did I mention this 27 feature firmware upgrade was free :o)
Focus Point Selection Without Fn Button This is a big thing and I wish it would come to all of the X-series cameras. It's actually more important for other bodies than the X-T1 as each of the four buttons on the D pad could already be set individually to move the focus point. The difference now is that you can not only do this as a single option (rather than having to set 4 individually), but the focus point moves with the first press instead of being activated by the first press than moving with each press after that. I shoot with five different X-Series bodies (not at the same time though:o) and every one of them has a different way to activate focus point selection. This drives me nuts, but if this feature was added to all the other models it would make life so much easier.
Q Menu Customisation We can now customise the Q menu and although it doesn't cover everything, there is a good choice of items that can be added. This will be super useful! There are a couple of items in the Q menu that I've never used and a couple that I really needed that were missing. Out goes Colour and AF Mode. In comes Silent Mode and Face Detection. I was really annoyed when the X-T1 was released and the ability to access Silent Mode by holding the Display button down for a couple of seconds (as it is on the X-Pro1, X-E1 and X100 series) had been replaced with quick access for function button assignments. So although I'd rather have Silent Mode on the Disp button, I'm happy that it's now in my Q Menu.
Classic Chrome Film Simulation Classic Chrome Film Simulation has been the biggest buzz among Fuji users since it was mentioned around the time of Photokina this year. It's a desaturated look that will work well for documentary photography. I'll need to shoot with it for a while to know if it will become my preferred Film Simulation, but I'm excited by it and look forward to using it this weekend. The downside right now is that none of my other cameras have Classic Chrome, so I will have to shoot with just the X-T1 or switch to another film simulation if I shoot with more than one body to keep the look consistant
Electronic (Silent) Shutter With a maximum shutter speed of 1/4000 of a second, shooting outside, wide open with f1.4 and f1.2 lenses would require an ND filter. But with the addition of Electronic Shutter, we can now shoot up to 1/32,000th of a second. Another big plus to this is that the electronic shutter is absoluly silent. You think an X100 is quiet, this has zero noise. One downside is that if you shoot in fluorescent light with the electronic shutter, you will get shaded horizontal lines across your pictures. So be very careful if you are using this feature at an event that canot be re-shot (weddings etc..)
Preview Exposure In Manual Mode on Fn Button This is another important one for me as I shoot in manual mode a lot. I can be shooting outside, then in a dark theatre or maybe doing some portraits with flash. Having to find this feature in the menu was a pain and could cause shots to be missed. I have chosen to assign this to the front Fn button at the moment, but even in the Q menu (which is now possible) this would still be a lot more accessible.
Instant Macro on Fn Button I have assigned my top Fn button for Macro. This is handy, but one of the great new features is that it acts like a toggle switch, rather that having to press 3 times, or press and use the directional pad and then hit OK. It's worth mentioning that the top plate Fn button can be assigned to a seperate function in shooting mode, but will still work for WiFi when in Playback mode. One button, two functions...nice!
Reverse AE/L and AF/L Buttons Back button focusing could feel a little awkward on the X-T1 because the AF/L button is a little too far to the right. But now the functions of the AF/L and AE/L buttons can be switched, making it move comfortable (especially if you're right eyed).
3 Custom White balance Memories I'm a lover of custom white balance whenever possible. I have both a Colour Checker Passport and an ExpoDisc which can save a lot of time in post processing. Custom White balance now has three slots to store different WB setups, ideal if you shoot regularly in different locations. I didn't expect this one.
AF + MF Another handy feature that allows you to focus in AF mode using a half press of the shutter button, but then tweak it manually using the focus ring. Default is Off, so you need to turn this on after upgrading to v3.0. As with Manual Focus, the viewfinder zooms in automatically to check focus (if Focus Check is turned on in the Screen Setup menu).
A couple of features that I'd like to see added or adjusted in a future update (not wanting to seem ungrateful).
- I was expecting that the Exposure Compensation Dial would work in Manual Mode when using Auto ISO. This one still needs fixed, because without this Manual Mode acts like 100% auto.
- It would be great to have more features available to be part of a Custom Setting. I'm thinking of Preview In Manual Mode and maybe Macro, but there are many more.
- I'd like to be able to use the front Fn button to activate the D Pad as individual Fn buttons while they are in Focus Point Selection Mode. Kind of reverse from what it used to be.
- This might be a strange request, but very useful for street photographers: I'd like to shoot using the viewfinder, but to also have the focus point displayed on the LCD. No image or anything else, just the white box or a crosshair. Then the focus point could be moved into position before raising the camera to your eye.

The main thing (IMO) for future X Series cameras (and legacy ones as much as possible), is to be as consistent as possible in button layout and features. I'm really hoping for updates to my other cameras, especially my X100S. I know the new X100T has similar features to this X-T1 update, but I haven't had the X100S that long and I'd like to get some use out of it.
Out & About With The Fuji 50-140mm f2.8
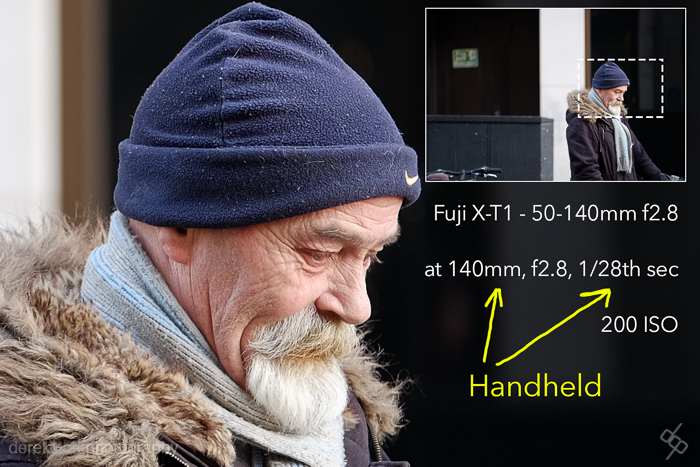 I went walkabout the other day while there was a bit of good weather, and by that, I mean dry and bright, because it certainly wasn't warm. I wanted to try out the Fuji 50-140 f2.8 in daylight. I've already reviewed the lens under studio conditions which you can see HERE. I ended up shooting some street photography and capturing something I wouldn't have thought possible, handholding at the equivalent of 210mm at 1/28th of a second and getting a sharp image. I had to double check the Exif Data on this one because I thought I was seeing things. As you can see from the crop above, this is again very sharp and I'm shooting wide open at f2.8. You can see the street shots I took processed in B&W using Silver Efex Pro over at 35mmStreet. But have a look at some colour shots before you go.
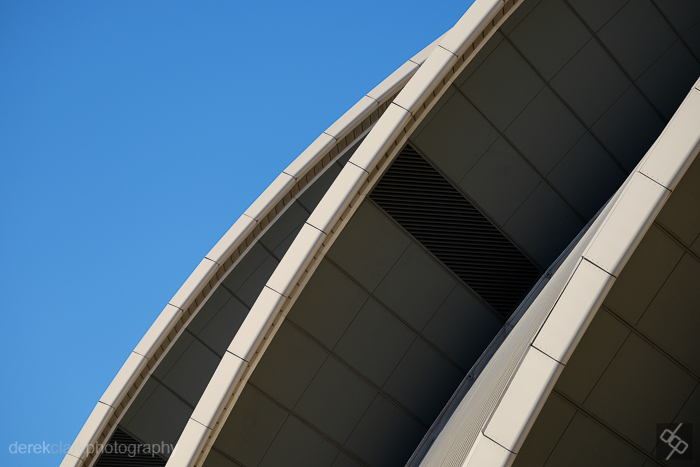
 Before I reached the streets I went for a walk near the Science Centre by The River Clyde in Glasgow (Scotland). The next few pictures should show how sharp this thing is. It does take the X Series on a different direction because when the 50-140mm is attached to an X body, gone is that feeling of small, discreet, fly on the wall photography. It's a big lens and it feels and looks like a 70-200mm. The size of the camera doesn't really matter. I was using the X-T1 with the battery grip.

Colour, as always with Fuji, looks great. It was late afternoon, but the sun was already dropping fast

I'm not that into the look of these trees in the background, it’s a bit jaggy and distracting. But I think this is more to do with the shape of the greenery, rather than the lens. I say this because the next photo (bellow) is not like this at all.

I love the articulated screen on the X-T1, but I didn't think I needed one until I used it on the X-M1 when it came out and loved it. At f2.8 and with the camera so low, you can see just how buttery this lens can be. Focus is fast, silent and locks on easily on even the most difficult scenes.

I tried hard, but I just couldn't get any lens flare at all. The sun was bright and I was shooting towards it, but between the glass and that deep hood, there was zero flare.

When I shoot street photography with a 35mm, I mostly keep moving. But with this long zoom I found it lends itself to finding a good spot and waiting for interesting subjects to pass through. I can't say that I felt comfortable walking around with this lens attached to the X-T1 with battery grip, as I like to be as invisible as possible with my X100S or as I was when the sun went down on this day, with my X-Pro1 and the 18mm f2. But as this won't be a regular thing, I actually enjoyed it for what it was.


 No problem shooting from across a busy street, as although it's a large lens, you can be a good distance away. Again you can see more street photography with this lens over at 35mmStreet